The Annotation window of the Image Markup Tool

The Annotation window of the Image Markup Tool


X
Add a new annotation
This creates a new annotation area in the centre of the viewport.
X
Clone annotation
This button creates a clone of an existing selected annotation. This can save time if you are creating many similar annotations with only minor variations.
X
Create new category
All annotations are assigned to a category, and this button allows you to create and configure new categories.
X
Category manager
Click on this button to show the Category manager window, where you can create and edit categories, and also change their order.
X
Delete annotation
This deletes the selected annotation (after a confirmation message).
X
Category selection buttons
Each category you create for annotations has its own button here; pressing the button will show the list of annotations which are in that category in the annotation list on the right.
At the top is the "All" button, which shows all the annotations from all categories in the list.
X
Category properties button
This button will bring up a dialog box where you can set the properties of the category which is selected on the left. Properties include the colour and shape used to display annotation areas on the image, the ID of the category (a well-formed xml:id which is also used for the category button's caption) and the description of the category.
X
Show all annotations checkbox
Annotation areas on the image can be hidden or shown, in order to help you work with lots of annotations which may be overlapping. Each individual annotation can be hidden or shown by clicking on the checkbox next to it in the list below, but the whole set of annotations in the list can be hidden or shown together by using this checkbox at the top. This enables you to turn on or off the display of whole categories of annotation with one click.
X
List of annotations
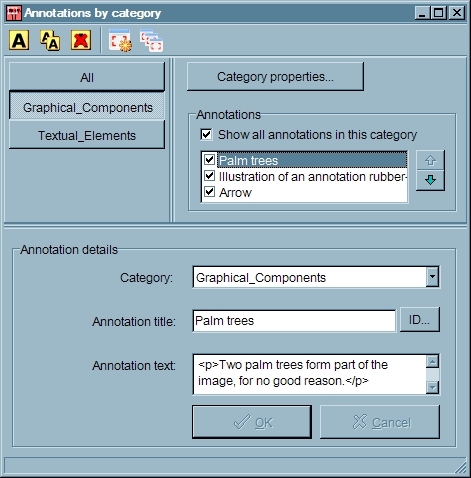
This list shows all of the annotations in the currently-selected category (or all the annotations in the project, if "All" is selected). You can turn on or off the display of individual annotation areas on the image by checking the checkbox next to the annotation title. Clicking on the title to select it will do two things:
  1. Show the annotation title and text in the "Annotation details" box below.
  2. Select the annotation area on the image itself.
Double-clicking on the title of an annotation will centre the image display on the annotation area (so you can easily find it on a large image).
X
Annotation ordering buttons
Use these buttons to move selected annotations up or down in the list of annotations.
X
Category selector
Use this drop-down list to select the category for an annotation. You can also use this list to create a new category if you need to, by selecting the first option in the list ("Create a new category...").
X
Annotation title
This is the title of your annotation. In TEI terms, the annotation is a <div>, and the title is a <head> tag inside it.
X
Annotation text
Here you type the text of your annotation. Note that all text needs to be enclosed in TEI tags which can be legitimate children of <div>. In the simplest case, that means putting your text inside one <p> tag (which is what the program provides by default), but you could also use <list>, <lg> and so on. Remember to escape angle brackets and ampersands, as you would in any TEI markup project.
X
OK and Cancel buttons
When you have edited an annotation, use the OK button to save the results, or the Cancel button to revert to the original stored version.
X
ID button
Each annotation is a TEI div element with its own @xml:id attribute. Normally, the program creates and manages these ids for you, but if you want to set the id yourself for some reason, click on this button to specify a new id for the selected annotation.
Annotations